Mastering motion graphics in After Effects can seem daunting, but breaking it down into manageable steps reveals a surprisingly accessible process. This guide provides a clear pathway to creating professional-quality animations, focusing on efficient workflows, core techniques, and advanced polishing strategies. We’ll explore project planning, essential After Effects features, and finishing touches that elevate your work from amateur to expert.
From initial concept to final render, we’ll cover everything you need to know. Learn how to leverage keyframes for smooth animations, utilize 3D capabilities for realistic camera movements, and master techniques like shape layers, masks, and expressions. We’ll also discuss optimizing your render settings for optimal file size and quality. By the end, you’ll possess the skills and knowledge to confidently tackle any motion graphics project.
Project Setup and Planning

Efficient project setup and planning are crucial for creating professional motion graphics in After Effects. A well-defined workflow ensures a smooth process, minimizes errors, and ultimately saves time and resources. Careful planning from the initial concept to the final render is key to achieving a polished and professional result.
A typical After Effects project workflow involves several key stages. Effective time management at each stage is essential to meet deadlines and maintain creative momentum. Let’s examine a detailed workflow, incorporating realistic time estimates for a moderately complex project.
After Effects Project Workflow
This workflow Artikels the steps involved in creating a typical motion graphics project in After Effects, providing estimated timelines for each stage. These times are approximate and can vary depending on project complexity and individual skill levels. A simple logo animation might take less time, while a complex animated explainer video will naturally take significantly longer.
- Concept & Design (2-4 hours): This stage involves brainstorming ideas, sketching initial concepts, and creating mood boards or style guides. This might include researching similar projects for inspiration and defining the overall aesthetic and style.
- Asset Creation (4-8 hours): This phase includes creating or sourcing all necessary assets, such as illustrations, logos, footage, and sound effects. This could involve using external software like Illustrator for vector graphics or Photoshop for raster images. For a simple logo reveal, this step might be shorter.
- Project Setup in After Effects (1-2 hours): Create the project file, set up the composition settings (resolution, frame rate, duration), import assets, and organize your project files efficiently using folders and pre-comps.
- Animation & Compositing (8-24 hours): This is the core of the project, involving animating elements, adding effects, and compositing layers. This stage might require multiple iterations and refinements. The time estimate depends heavily on the complexity of the animation.
- Rendering & Export (1-3 hours): This involves choosing the appropriate render settings (codec, resolution, frame rate), rendering the final output, and exporting the video file in the required format. This could involve rendering multiple versions for different platforms.
- Review & Refinement (2-4 hours): This crucial step involves reviewing the final render, making any necessary adjustments, and ensuring the project meets the client’s requirements or your own standards. This may include addressing feedback and making further iterations.
Essential After Effects Plugins
Several plugins can significantly enhance your workflow and capabilities within After Effects. These tools can streamline repetitive tasks, add creative effects, and improve overall efficiency.
- Element 3D: This plugin allows for the creation and manipulation of 3D objects and scenes within After Effects, expanding creative possibilities beyond 2D animation.
- Red Giant Trapcode Suite: A collection of plugins offering a range of effects, including particle systems (Particular), 3D object creation (Form), and optical flares (Light).
- Video Copilot Optical Flares: Creates realistic lens flares and other optical effects, adding a professional touch to your projects.
- Mocha Pro: A powerful planar tracking and masking tool, invaluable for integrating CGI elements seamlessly into live-action footage or for precise rotoscoping.
- Saber: A versatile plugin for creating and animating realistic light effects, enhancing visual storytelling and adding dramatic impact.
Sample Project Plan: Animated Logo Reveal
This table Artikels a simplified project plan for a short animated logo reveal, demonstrating how to break down a project into manageable tasks with estimated timelines. Remember to adjust these estimates based on your specific needs and skill level.
| Task | Description | Time Estimate | Status |
|---|---|---|---|
| Concept & Design | Sketching, style guide creation | 2 hours | Complete |
| Logo Vectorization | Creating a clean vector version of the logo in Illustrator | 1 hour | Complete |
| After Effects Setup | Creating the project file, importing assets | 30 minutes | Complete |
| Animation | Animating the logo reveal (e.g., zoom, fade, particles) | 3 hours | In Progress |
| Sound Design | Adding a short sound effect | 1 hour | To Do |
| Rendering & Export | Rendering and exporting the final video | 1 hour | To Do |
| Review & Finalization | Reviewing and making final adjustments | 30 minutes | To Do |
Core Techniques

This section delves into the essential After Effects features crucial for crafting professional motion graphics. We’ll explore keyframing techniques, mastering 3D camera movement, and comparing the strengths of shape layers versus pre-composed layers in complex animations. Understanding these core techniques will significantly elevate the quality and efficiency of your motion graphics projects.
Keyframe Interpolation Methods
Keyframes are the foundation of animation in After Effects. They define the starting and ending points of an animation, with After Effects interpolating the values between them. The choice of interpolation method significantly impacts the smoothness and character of the animation. Different methods offer varying degrees of control over the transition between keyframes. Let’s examine the most commonly used interpolation types:
- Linear: Linear interpolation creates a constant rate of change between keyframes. Imagine a straight line connecting two points on a graph; this is the visual representation of linear interpolation. It’s suitable for animations requiring consistent speed, like a simple object moving across the screen at a constant velocity. However, it can appear jerky for more complex animations.
- Bezier: Bezier interpolation provides more control over the animation’s speed and easing. Imagine the line connecting two points now curving smoothly. You can adjust the curve’s tangents to fine-tune the acceleration and deceleration of the animation, creating a more natural and fluid movement. This is ideal for creating realistic-looking movements or subtle animations.
- Hold: Hold interpolation maintains the value of a keyframe for a specified duration. This is useful for pausing an animation at a specific point or creating abrupt changes. Visually, this would be represented by a horizontal line on the graph, indicating no change in value over time.
Creating Realistic Camera Movement
After Effects’ 3D capabilities allow for the creation of realistic camera movements, adding depth and dynamism to your animations. To achieve this, you must first enable 3D layers for both the camera and the elements you wish to animate. Next, utilize the camera’s position, rotation, and orientation properties to simulate various camera movements. Experiment with keyframing these properties to create pans, tilts, zooms, and dolly shots. For example, to create a smooth camera pan, you would gradually adjust the camera’s rotation properties over a series of keyframes, using Bezier interpolation for a natural feel. Remember to adjust the camera’s field of view (FOV) to control the depth of field and perspective.
Shape Layers vs. Pre-Compositions
Choosing between shape layers and pre-compositions is a crucial decision in managing the complexity of your animation. Each approach has its own advantages and disadvantages:
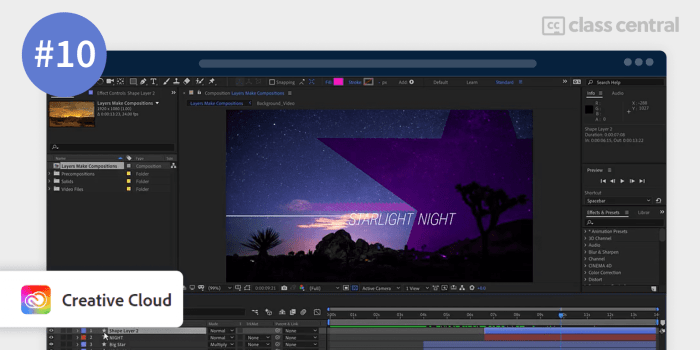
- Shape Layers: Shape layers are excellent for creating vector-based animations. They are lightweight and offer precise control over individual shape properties. However, managing a large number of shape layers within a single composition can become cumbersome and difficult to organize.
- Pre-Compositions: Pre-compositions allow you to group layers into self-contained units. This simplifies the main composition’s structure and improves workflow. Changes to the pre-composition update automatically throughout the project. However, pre-compositions can increase rendering time and might complicate debugging if not managed carefully.
A good strategy is to use shape layers for simpler animations and pre-compositions to organize complex scenes and maintain a manageable project structure. This balance allows for both precision and efficient workflow.
Advanced Techniques and Finishing Touches

Polishing your motion graphics in After Effects involves mastering advanced techniques to elevate your projects from good to exceptional. This section delves into sophisticated animation methods, precise element isolation, and optimal render settings for achieving professional-quality results. We’ll explore techniques that will significantly enhance the visual appeal and overall impact of your work.
Stylized Text Animation with Expressions
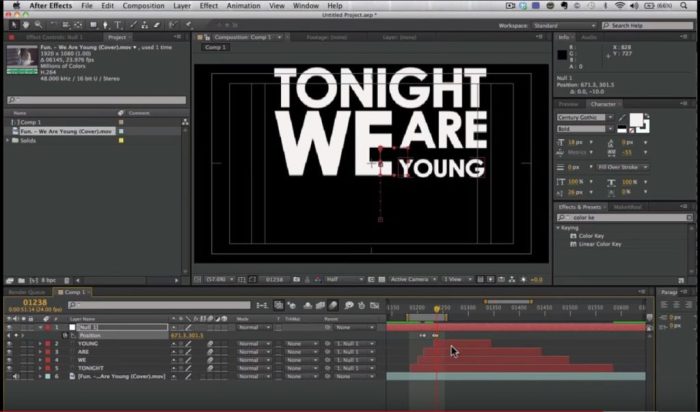
Creating dynamic and stylized text animations is a key aspect of professional motion graphics. Expressions in After Effects provide a powerful way to achieve complex and unique animation effects without relying solely on keyframes. This allows for more organic and responsive animations. Let’s create a simple, yet effective, example.
First, create a text layer with your desired text. Then, select the “Position” property in the Timeline panel. Click the stopwatch icon to create a keyframe at the beginning of your animation. Now, instead of manually keyframing, we’ll use an expression to control the position. Right-click on the Position property and select “Add Expression.”
Paste the following expression into the expression editor:
amplitude = 10;

frequency = 2;

timeOffset = 0;
wiggle(frequency, amplitude);
This expression uses the `wiggle()` function to create a subtle, oscillating movement. `amplitude` controls the intensity of the wiggle, `frequency` determines how often it oscillates, and `timeOffset` introduces a phase shift. Experiment with adjusting these values to achieve different effects. For a more complex animation, you can incorporate other properties like scale, rotation, or opacity into the expression. More advanced expressions can even respond to other layer properties or audio data.
Masking and Rotoscoping Techniques
Precisely isolating and animating specific elements within a video clip is crucial for many motion graphics projects. Masking and rotoscoping techniques offer the precision needed for this. After Effects provides several masking methods, each suitable for different scenarios.
Shape Layers: These are versatile for creating simple masks. You can draw shapes like rectangles, ellipses, or paths directly on your layer to mask specific areas. Adjusting the shape’s properties allows for dynamic masking effects.
Pen Tool: For more complex or irregular shapes, the Pen Tool offers precise control. It allows you to create smooth, curved paths to mask intricate details within your footage.
Rotoscoping: This technique involves manually tracing around moving elements in your video frame by frame. It’s ideal for isolating objects with complex or irregular shapes that cannot be easily masked with simpler methods. After Effects simplifies this process with its rotoscoping tools, which allow you to create and refine masks over time.
Track Mattes: These are particularly useful for compositing multiple layers. A track matte allows one layer to control the visibility of another, providing sophisticated masking capabilities for complex scenes.
Once you’ve created your masks, you can animate them by keyframing their properties. This allows you to reveal or conceal specific elements over time, creating dynamic visual effects.
Final Render Settings Checklist
Proper render settings are paramount for achieving the desired balance between file size and quality. Overlooking this can lead to unnecessarily large files or compromised visual fidelity. This checklist ensures you’re optimizing your renders for the best results.
| Setting | Description |
|---|---|
| Resolution | Choose the appropriate resolution (e.g., 1920×1080, 3840×2160) based on your project’s intended platform and use. Higher resolutions result in larger file sizes but better visual clarity. |
| Frame Rate | Match the frame rate to your source footage or target platform. Standard frame rates include 24fps, 25fps, and 30fps. |
| Output Module | Select the appropriate output module (e.g., QuickTime, H.264, ProRes) based on your needs. Different codecs offer varying levels of compression and quality. ProRes offers high quality with larger file sizes, while H.264 is suitable for web distribution with smaller files. |
| Bit Depth | Higher bit depth (e.g., 16-bit) increases color information, resulting in smoother gradients and better quality but larger file sizes. 8-bit is usually sufficient for most projects. |
| Compression | Adjust compression settings depending on the codec. Higher compression reduces file size but can impact quality. |
Closure

Creating compelling motion graphics in After Effects is a journey of skill development and creative exploration. By following a structured approach that emphasizes planning, mastering core techniques, and meticulous finishing, you can transform your ideas into polished, professional animations. This guide provides the framework; your creativity will bring the vision to life. Embrace the process, experiment with different techniques, and watch your motion graphics flourish.