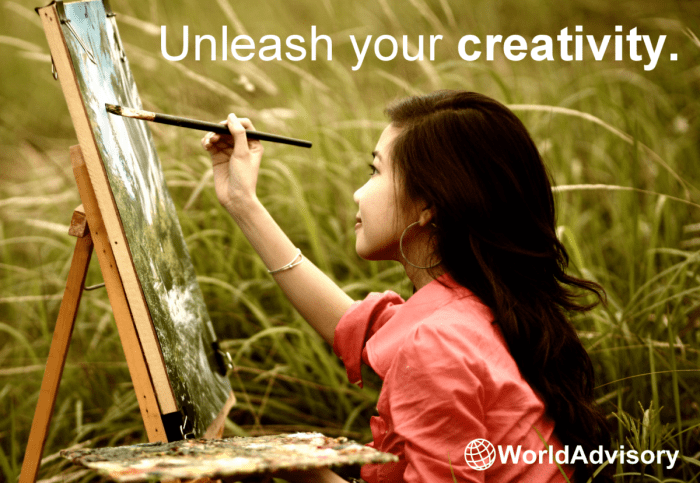
Transform your images from ordinary to extraordinary with this comprehensive guide. We delve into both fundamental and advanced photo editing techniques, equipping you with the skills to master popular software like Photoshop and GIMP. From adjusting basic settings to creating stunning composite images and exploring trending styles, this resource is your passport to unlocking your creative potential and elevating your design projects.
Discover practical, step-by-step instructions, insightful comparisons of different tools and techniques, and inspiring examples showcasing diverse editing styles. Learn to harness the power of layer masks, color grading, retouching, and more, all while staying current with the latest industry trends. Whether you’re a seasoned professional or a budding enthusiast, this guide offers something for everyone seeking to refine their photo editing skills.
Mastering Basic Photo Editing Techniques

Developing proficiency in fundamental photo editing techniques is crucial for any designer. These techniques form the bedrock of more advanced editing, allowing you to transform your images from snapshots to polished visuals. Mastering these basics will significantly improve the quality and impact of your work.
Adjusting Brightness, Contrast, and Saturation
Precise control over brightness, contrast, and saturation is paramount for achieving the desired mood and visual impact. These adjustments directly influence the overall appearance of an image, affecting its perceived luminosity, tonal range, and color intensity. Let’s explore how to manipulate these elements using Adobe Photoshop and GIMP, two popular photo editing software packages.
| Feature | Photoshop | GIMP |
|---|---|---|
| Brightness Adjustment | Found within the “Image” > “Adjustments” menu, or via the Levels or Curves tools. The Brightness/Contrast adjustment layer offers a simple interface for quick adjustments. | Located under “Colors” > “Brightness-Contrast”. Similar adjustments can be made using the “Levels” tool found under “Colors” > “Levels”. |
| Contrast Adjustment | Accessed via the “Image” > “Adjustments” menu, or through the Levels or Curves tools. These tools offer precise control over the tonal range. | Found under “Colors” > “Brightness-Contrast”. The “Curves” tool (under “Colors” > “Curves”) provides more advanced contrast control. |
| Saturation Adjustment | Available through the “Image” > “Adjustments” menu, or using the Hue/Saturation adjustment layer. This provides control over the intensity of colors. | Found under “Colors” > “Hue-Saturation”. This tool allows for adjusting the saturation of individual color channels or the entire image. |
Cropping and Straightening Images
Cropping and straightening are essential composition tools. Cropping removes unwanted elements, improves framing, and directs the viewer’s attention. Straightening corrects tilted horizons and improves the overall visual appeal, ensuring a more professional and balanced image.
Imagine a photograph of a landscape with a slightly crooked horizon. A visual tutorial would show the before-and-after of using the crop tool to select the desired area, eliminating distracting elements, and simultaneously using the straighten tool to correct the horizon, resulting in a much more visually pleasing image. The before image would show a tilted horizon and distracting elements in the foreground and background. The after image would display a perfectly level horizon with a more focused and balanced composition. The steps would involve selecting the cropping tool, adjusting the selection area, and then using the straighten tool to align the horizon.
White Balance Correction
Correct white balance is crucial for achieving accurate and natural-looking colors in your photographs. Inaccurate white balance can result in images that appear too warm (yellowish or orange) or too cool (bluish). Correcting it ensures that white appears white, and other colors are accurately represented.
Common white balance presets include:
- Auto: The software automatically attempts to determine the correct white balance.
- Daylight: Suitable for outdoor shots under direct sunlight.
- Shade: For outdoor shots taken in the shade.
- Cloudy: For overcast conditions.
- Tungsten: For indoor shots under incandescent lighting.
- Fluorescent: For indoor shots under fluorescent lighting.
A before-and-after image pair would showcase a photo taken under incandescent lighting. The “before” image would have a strong orange cast, while the “after” image, after applying a “Tungsten” white balance preset, would exhibit accurate and natural colors.
Sharpening Techniques
Various sharpening techniques exist, each with its own strengths and weaknesses. Understanding these differences is key to selecting the optimal method for your image and avoiding unwanted artifacts.
Unsharp Mask is a widely used technique that increases the contrast at the edges of objects. It’s effective but can introduce halos around sharp edges if overused. Smart Sharpen, often found in Photoshop, provides more refined control and is less prone to artifacts. High Pass filtering involves creating a high-pass layer and blending it with the original, subtly increasing detail. Each method’s effectiveness depends on the image’s initial sharpness and the desired level of enhancement. Over-sharpening can lead to a grainy or unnatural appearance. A comparative analysis would show examples of an image sharpened using each technique, highlighting the differences in detail and the potential for artifacts.
Exploring Advanced Photo Manipulation and Effects
Having mastered basic photo editing techniques, we can now delve into more advanced manipulations and effects to elevate our image editing skills. This section will explore powerful tools and techniques to transform your photos from good to exceptional, focusing on layer masks, color grading, retouching, and compositing.
Layer Masks for Selective Adjustments
Layer masks offer unparalleled control over the application of adjustments and effects. Instead of globally applying a filter or adjustment, a layer mask allows you to target specific areas of an image. This is achieved by painting on the mask; black hides the effect, white reveals it, and greys create a gradual transition. For instance, you might use a layer mask to selectively brighten a subject’s face without affecting the background. The precision offered by layer masks is invaluable for non-destructive editing, allowing for adjustments and refinements without permanently altering the original image. This flexibility is crucial for achieving subtle and professional results.
Realistic Color Grading with Adjustment Layers and Blending Modes
Color grading significantly impacts the mood and atmosphere of a photograph. Adjustment layers, combined with various blending modes, provide a non-destructive method to achieve sophisticated color grading effects. Blending modes determine how the adjustment layer interacts with the underlying image. Experimenting with different blending modes can dramatically alter the final look.
| Blending Mode | Effect |
|---|---|
| Normal | The adjustment layer’s effect is applied directly to the image. |
| Soft Light | Subtly adjusts the contrast and color saturation. Ideal for subtle enhancements. |
| Overlay | Similar to Soft Light, but with a more pronounced effect. Good for adding warmth or coolness. |
| Color | Applies only the color information from the adjustment layer, ignoring brightness. |
| Luminosity | Applies only the brightness information from the adjustment layer, ignoring color. |
Retouching Portraits to Remove Blemishes and Imperfections
Retouching tools are essential for enhancing portraits by removing blemishes, smoothing skin, and generally improving the overall appearance. Tools like the Healing Brush, Clone Stamp, and Spot Healing Brush are frequently used for this purpose. The key to successful retouching is subtlety; the goal is to enhance the image, not to create an unrealistic or artificial look. Careful attention to detail and a light hand are crucial for achieving natural-looking results.
Creating Seamless Composite Images
Compositing involves combining multiple photographs to create a single, cohesive image. This process often requires careful attention to lighting, color, and perspective to ensure a seamless blend.
Creating a convincing composite image involves several steps:
- Selecting Source Images: Choose high-resolution images with compatible lighting and color palettes.
- Cutting Out Subjects: Use selection tools (like the Pen Tool or Lasso Tool) to carefully isolate the subjects you want to composite.
- Matching Lighting and Color: Adjust the brightness, contrast, and color balance of the individual elements to match the overall tone of the composite.
- Blending Modes: Experiment with blending modes to seamlessly integrate the different elements.
- Refining Details: Use retouching tools to eliminate any harsh edges or inconsistencies.
- Final Adjustments: Make final adjustments to color, contrast, and sharpness to ensure a polished look.
Creative Photo Editing Styles and Trends

Photo editing has evolved from a purely technical process to a powerful artistic medium. Understanding and employing various styles and trends can significantly elevate your design work, allowing you to express unique visions and resonate with contemporary aesthetics. This section explores diverse photo editing styles, current trends, and techniques for integrating text and graphics, equipping you with the knowledge to create compelling visual narratives.
Photo Editing Styles
Different styles offer distinct visual languages. Mastering these styles allows for greater creative control and the ability to tailor your editing to specific projects and audiences.
Vintage: This style evokes a nostalgic feeling, often characterized by faded colors, increased grain, and a slightly muted tone. Think warm sepia tones, soft focus, and subtle vignette effects. The goal is to create a sense of timelessness and history.
Minimalist: Minimalist editing focuses on simplicity and clean lines. It prioritizes a limited color palette, often featuring high contrast and a lack of distracting elements. The emphasis is on highlighting the subject with a clean, uncluttered background.
Surreal: Surreal photo editing manipulates reality to create dreamlike or fantastical images. This often involves combining disparate elements, altering perspectives, and employing unexpected juxtapositions to create a sense of wonder and intrigue. The key is to challenge conventional perceptions of reality.
Current Photo Editing Trends
The landscape of photo editing is constantly evolving, with new filters, effects, and techniques emerging regularly. Staying current with these trends is essential for maintaining a fresh and contemporary aesthetic.
Popular filters currently include those that emulate film grain, vintage looks (as described above, but with more specific variations like Kodachrome or Lomo effects), and those that enhance specific color palettes (e.g., muted pastels or vibrant neons). Popular effects involve double exposures, light leaks, and the use of textures to add depth and visual interest. Techniques such as selective colorization, where only specific parts of an image are in color, are also gaining traction. For example, a modern trend is to selectively colorize elements within a black and white image, drawing attention to specific details.
Incorporating Text and Graphic Elements
Adding text and graphic elements transforms photographs into fully realized designs. Careful consideration of typography, placement, and overall composition is crucial.
Effective techniques include using text overlays to add context or create a narrative, employing graphic elements to complement the image’s mood or theme, and ensuring that the text and graphics enhance, rather than detract from, the overall visual impact. For instance, a bold sans-serif font might suit a modern architectural photograph, while a delicate script font might be better suited to a nature image. The size, color, and style of the text should also complement the overall visual style.
Resources for Advanced Photo Editing
Several excellent resources are available to help designers hone their photo editing skills. This table summarizes some key options.
| Category | Resource | Description |
|---|---|---|
| Software | Adobe Photoshop | Industry-standard software offering comprehensive editing capabilities. |
| Software | Adobe Lightroom | Powerful software for photo organization, editing, and retouching. |
| Software | GIMP | Free and open-source alternative to Photoshop, offering a wide range of features. |
| Tutorials | YouTube Channels (e.g., PiXimperfect, Photoshop Training Channel) | Numerous channels offer step-by-step tutorials on various photo editing techniques. |
| Websites | Phlearn | Website offering high-quality tutorials and resources for Photoshop users. |
| Websites | CreativeLive | Online platform offering courses and workshops on various creative subjects, including photo editing. |
Epilogue
Mastering photo editing is a journey of continuous learning and experimentation. By combining fundamental techniques with creative exploration, you can transform your images into powerful visual narratives. This guide has provided a solid foundation, equipping you with the knowledge and inspiration to confidently navigate the world of photo manipulation. Embrace the possibilities, refine your style, and watch your designs flourish.