Unlock your creative potential with this beginner-friendly guide to Canva! Learn to navigate its intuitive interface, master essential design tools, and transform your ideas into stunning visuals. From crafting eye-catching graphics to designing professional documents, this tutorial empowers you with the skills to create impactful designs, regardless of your prior experience.
We’ll cover everything from the basics of the Canva interface and uploading your own assets to more advanced techniques like creating compelling color palettes and collaborating on projects. By the end, you’ll be confident in using Canva to bring your creative vision to life.
Getting Started with Canva

Canva is a user-friendly graphic design platform perfect for beginners. Its intuitive interface and vast library of templates make creating visually appealing designs accessible to everyone, regardless of design experience. This tutorial will guide you through the basics of using Canva, from setting up your account to mastering fundamental editing tools.
Canva Interface and Basic Features
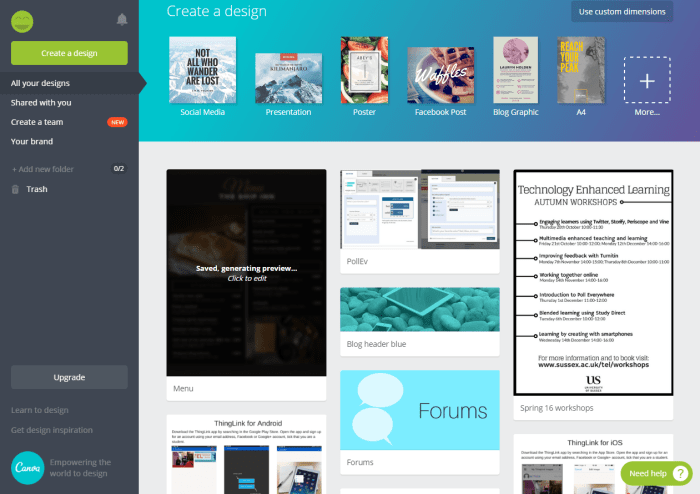
The Canva interface is designed for ease of use. The main workspace consists of the editor, where you create your design; the toolbar, containing essential tools and options; and various design panels, providing access to elements like templates, images, text, and more. The editor is the central area where your design takes shape, displaying a canvas with customizable dimensions. The toolbar, typically located on the left, offers quick access to tools for adding elements, editing images, and adjusting design properties. Design panels, usually located on the right, provide access to a vast library of resources and settings.
Creating a New Design
Creating a design in Canva is straightforward. Upon logging in, you’ll see options to start a design from scratch or choose from a wide variety of templates categorized by design type (e.g., social media posts, presentations, flyers). To create from scratch, select the “Create a design” option and specify the desired dimensions. For using a template, simply browse the available options, select one that suits your needs, and customize it to your liking.
Uploading Custom Images and Fonts
Canva allows you to incorporate your own images and fonts. To upload custom images, navigate to the “Uploads” section (usually found in the left-hand toolbar), click the “Upload media” button, and select the image files from your computer. Once uploaded, your images will appear in the “Uploads” panel, ready to be dragged and dropped onto your design canvas. Uploading custom fonts follows a similar process. Go to the “Elements” panel, click “Uploads,” and select the font file. After uploading, the font will be available in your text options.
Basic Editing Tools
Canva provides a range of basic editing tools. Cropping allows you to trim and adjust the dimensions of images. Simply select the image, click the “Crop” tool, and drag the handles to define the desired area. Resizing can be done similarly; select the element, drag the handles to adjust its size. Text formatting tools offer options for font style, size, color, alignment, and spacing. Select the text, and use the options in the top toolbar to adjust these parameters.
| Feature | Free Plan | Pro Plan | Enterprise Plan |
|---|---|---|---|
| Template Access | Limited selection | Full access to all templates | Full access, plus custom branding |
| Image Library | Limited selection | Extensive library with premium images | Extensive library with premium images and custom brand kit |
| Storage | Limited storage | Increased storage capacity | High storage capacity, team folder sharing |
| Brand Kit | Not available | Available | Available with advanced features |
Designing Elements in Canva
Canva offers a robust suite of design elements, allowing users to create visually appealing and effective designs. Mastering the use of text, images, and shapes is crucial for achieving professional-looking results. This section will guide you through best practices for incorporating each element into your Canva projects.
Text Formatting in Canva
Effective typography significantly impacts the readability and overall aesthetic of your design. Careful consideration of font selection, hierarchy, and styling ensures your message is clear and engaging. Choosing the right fonts and applying appropriate formatting helps to create visual interest and guide the reader’s eye through your content.
- Font Selection: Choose fonts that are legible and appropriate for your design’s purpose. Consider using a maximum of two different font families to maintain visual consistency. Serif fonts (like Times New Roman) are generally better for body text, while sans-serif fonts (like Arial or Helvetica) are often preferred for headlines and shorter text segments.
- Font Hierarchy: Establish a clear visual hierarchy using different font sizes and weights. Larger, bolder fonts should be used for headlines, while smaller, lighter fonts are suitable for body text. This guides the reader’s eye and improves readability.
- Styling Options: Canva provides a wide range of text styling options, including bold, italic, underline, strikethrough, and different capitalization styles (e.g., all caps, small caps). Use these options sparingly to emphasize key words or phrases and avoid overwhelming the reader.
- Color and Spacing: Consider the color of your text against the background. Ensure sufficient contrast for readability. Appropriate spacing between lines (leading) and letters (kerning) enhances readability and overall design aesthetics.
Image Selection and Usage in Canva
High-quality images are essential for creating professional-looking designs. Canva offers both free and paid image options, allowing users to find visuals that suit their needs and budget. Understanding the different image styles and their applications is key to successful design.
- Free Images: Canva provides a library of free stock photos, illustrations, and graphics. While convenient, the selection might be limited, and you may find the same images used repeatedly. Always check the license associated with free images to ensure you are permitted to use them for your intended purpose.
- Paid Images: Canva also offers a vast collection of premium images from various stock photography providers. These images are typically higher quality and more unique than free options. Paid images often come with commercial licenses, making them suitable for various projects, including marketing materials and commercial publications.
- Image Styles: Consider the style of image appropriate for your design. For example, a clean, minimalist style works well for corporate branding, while a more vibrant, playful style might be suitable for children’s products. Always ensure that your chosen images are consistent with your overall design aesthetic and brand identity.
Using Shapes, Lines, and Other Design Elements
Shapes, lines, and other design elements are powerful tools for enhancing visual appeal and organization in your Canva designs. They can be used to create visual interest, guide the reader’s eye, and improve the overall layout and structure of your designs. Strategic use of these elements can significantly elevate your design’s professional appearance.
Visual Example: Imagine a simple infographic illustrating the steps in a process. A series of interconnected circles, each containing a step number and a short description, could be arranged horizontally. Connecting lines could visually link each circle to the next, representing the sequential nature of the process. A larger, differently shaped box at the beginning could represent the starting point, and a similar box at the end could represent the conclusion. The use of different colors for each circle could further enhance visual clarity and appeal.
Infographic Design Example
Imagine a simple infographic on the benefits of using Canva. The infographic would feature three distinct sections, each represented by a different shape. The first section, a large square, could showcase the ease of use with a concise description and a relevant icon. The second section, a circle, could highlight Canva’s design features, listing key elements with corresponding icons. The third section, a triangle pointing upwards, could emphasize the professional results achieved, showcasing a before-and-after example of a design. Each section could use a consistent color scheme for better visual cohesion. The entire infographic would be laid out on a clean, light background, ensuring that the text and icons are easily readable and visually appealing. Headings and subheadings would use a clear font hierarchy, and the overall layout would be balanced and uncluttered.
Advanced Canva Techniques and Design Principles
Canva offers a wealth of features beyond the basics, allowing for sophisticated designs and efficient workflows. Mastering these advanced techniques and understanding fundamental design principles will elevate your creations from simple to stunning. This section will explore several key areas to help you unlock Canva’s full potential.
Canva Design Template Comparison
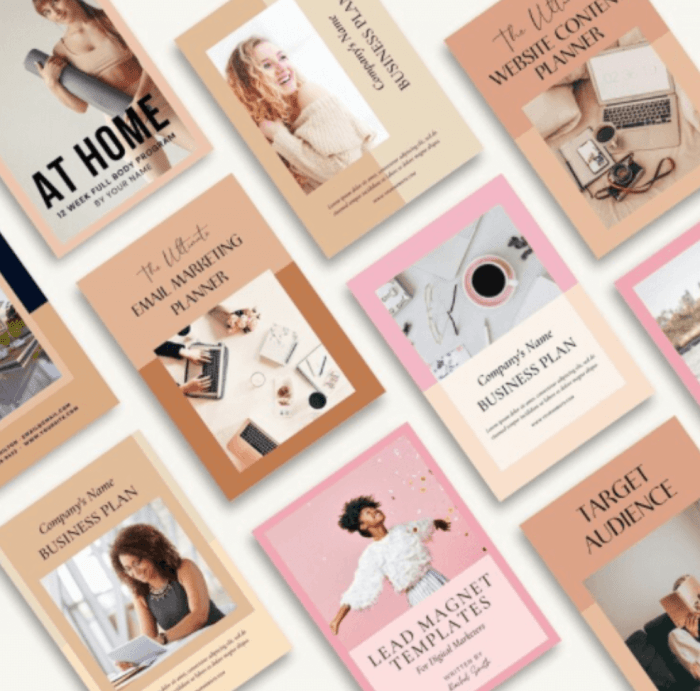
Canva provides a vast library of pre-designed templates, each with its own strengths and weaknesses. Choosing the right template is crucial for a successful project. For instance, templates for social media posts prioritize visual impact and brevity, often featuring a single, striking image and concise text. In contrast, presentation templates emphasize clear structure and readability, incorporating multiple sections, bullet points, and data visualizations. Marketing materials templates, such as brochures or flyers, focus on persuasive messaging and brand consistency, incorporating brand colors, logos, and high-quality imagery. The best template depends entirely on the intended purpose and target audience. A social media template would be unsuitable for a complex business proposal, while a presentation template would be less effective for a visually-driven Instagram post. Careful consideration of the project’s requirements is key to selecting the most effective template.
Creating Visually Appealing Color Palettes
Effective color palettes are essential for visually appealing designs. Canva simplifies this process with its intuitive color picker and pre-set palettes. The color picker allows for precise selection of colors using hex codes, RGB values, or by selecting a color directly from an image. Pre-set palettes offer curated color combinations based on various design styles and moods. Understanding basic color theory principles is crucial for creating harmonious and effective palettes.
| Color Theory Principle | Description | Example | Canva Application |
|---|---|---|---|
| Complementary Colors | Colors opposite each other on the color wheel (e.g., red and green). They create high contrast. | A vibrant red title against a deep green background. | Use the color picker to select a color, then find its complement using the color wheel feature. |
| Analogous Colors | Colors adjacent to each other on the color wheel (e.g., blue, blue-green, green). They create a harmonious and calming effect. | A design using shades of blue, teal, and green for a serene feel. | Select a base color and then choose adjacent colors from the color wheel or palette options. |
| Triadic Colors | Three colors evenly spaced on the color wheel (e.g., red, yellow, blue). They create a vibrant and balanced palette. | A design using red, yellow, and blue for a primary color scheme. | Use the color wheel to select three evenly spaced colors. |
| Monochromatic Colors | Different shades and tints of a single color (e.g., various shades of blue). They create a sophisticated and unified look. | A design using light, medium, and dark shades of purple. | Select a base color and adjust its lightness and saturation using the color picker. |
Utilizing Canva’s Collaboration Features
Canva’s collaboration features streamline teamwork on design projects. Users can easily share designs, allowing multiple individuals to contribute and edit simultaneously. This feature significantly improves efficiency, allowing for real-time feedback and collaborative design decisions. For example, a marketing team can collaborate on a social media campaign, with different team members responsible for different aspects of the design. The design can be shared, and everyone can work on their respective parts at the same time, providing immediate feedback and reducing the time spent on revisions.
Exporting Designs in Various Formats and Resolutions
Exporting your design in the correct format and resolution is crucial for ensuring its quality and compatibility across different platforms. Canva supports various export formats, including JPG, PNG, PDF, and more. Each format has its own strengths: JPG is ideal for photographs, PNG supports transparency, and PDF preserves vector graphics and text quality. Resolution (measured in pixels per inch or PPI) impacts the image sharpness. Higher resolutions are better for print designs, while lower resolutions are sufficient for web use. When exporting, select the appropriate format and resolution based on the intended use. For instance, a high-resolution PDF would be necessary for printing a brochure, while a lower-resolution JPG would suffice for a social media post.
Ending Remarks
Designing with Canva doesn’t have to be daunting. This tutorial has provided a structured path from understanding the basic tools to mastering more advanced techniques. Remember to experiment, explore Canva’s vast library of resources, and most importantly, have fun bringing your ideas to life. With practice and the knowledge gained here, you’ll be creating professional-looking designs in no time.