Unlocking the power of Adobe Photoshop can transform your designs. This guide delves into five essential techniques, empowering you to master layer management, selection tools, and powerful filters and effects. From creating non-destructive edits to refining selections with precision, we’ll explore the core functionalities that will elevate your design skills.
We’ll cover practical workflows, providing step-by-step instructions and visual examples to ensure you can immediately apply these techniques to your projects. Whether you’re a beginner or seeking to refine your existing skills, this guide offers a comprehensive and accessible approach to mastering Photoshop.
Mastering Layer Management in Photoshop

Effective layer management is crucial for creating complex and easily editable designs in Photoshop. A well-organized layer structure simplifies the editing process, prevents errors, and allows for seamless collaboration. This section details strategies for maintaining a clean and efficient workflow, focusing on naming conventions, grouping, layer masks, blending modes, and adjustment layers.
Layer Naming Conventions and Grouping Strategies
A consistent layer naming convention is fundamental to efficient layer management. Using descriptive names like “Background_Image,” “Logo_Text,” or “Button_Highlight” immediately clarifies the purpose of each layer. Avoid generic names like “Layer 1” or “Shape 2.” For complex projects, grouping related layers into folders is essential. For instance, all layers related to a specific element, like a website header, should be grouped together under a folder labeled “Header.” This organizational approach significantly improves navigation and allows for easy selection and manipulation of related components. Nested folders can further enhance organization for very intricate projects. Think of it like a well-organized file system on your computer; the clearer the structure, the easier it is to find and work with specific files.
Utilizing Layer Masks for Non-Destructive Editing
Layer masks offer a powerful non-destructive editing technique in Photoshop. They allow you to selectively hide or reveal portions of a layer without permanently altering the original pixel data. To create a layer mask, click the “Add layer mask” icon at the bottom of the Layers panel. A white mask represents full visibility, while black represents complete opacity. Gradients of gray create varying degrees of transparency. For example, to retouch a blemish on a portrait, create a layer mask on the layer containing the portrait. Using a black brush, carefully paint over the blemish to conceal it. The blemish is hidden only on the layer mask, leaving the original image intact. For compositing, imagine layering a person onto a different background. A layer mask on the person’s layer can be used to seamlessly blend the edges, ensuring a natural-looking composite image, by painting away portions of the person’s layer where the background shows through.
Blending Mode Analysis
Photoshop offers a wide variety of blending modes that alter how layers interact with each other. Each blending mode affects the way the pixels of the top layer are combined with the pixels of the underlying layers. For instance, “Multiply” darkens the underlying layer, useful for adding shadows. “Screen” brightens the underlying layer, ideal for creating highlights. “Overlay” increases contrast, making colors more vibrant. “Soft Light” adds subtle lighting effects. “Hard Light” produces more pronounced lighting effects. Consider an image with a bright sky and a dark foreground. Using the “Overlay” blending mode on a layer containing a bright sun would increase the contrast of the sun, making it stand out more against the sky without significantly altering the overall color scheme. Conversely, using “Multiply” on a layer containing a dark shadow would deepen its appearance without affecting the brightness of the sky.
Employing Adjustment Layers for Non-Destructive Color and Tone Modifications
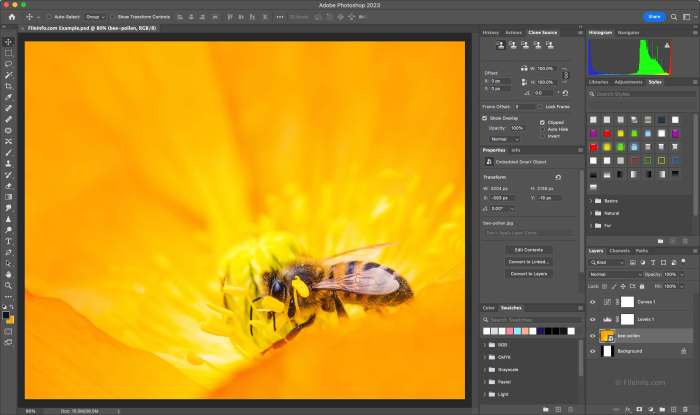
Adjustment layers provide a non-destructive way to modify color, contrast, and tone. Unlike directly editing the pixel data on a layer, adjustment layers create a mask that affects the layers below without permanently changing them. The Curves adjustment layer allows for precise control over the tonal range. You can adjust specific areas of the tonal range to achieve precise adjustments. Imagine a photo that is slightly underexposed. By using the curves adjustment layer, you can lift the shadows and brighten the image without affecting the original pixel data. The Levels adjustment layer provides a similar function but with a different interface, allowing for adjustment of the input levels (shadows, midtones, highlights) and output levels (black point, white point, gamma). The Hue/Saturation adjustment layer allows precise control over hue, saturation, and lightness. For instance, to increase the saturation of the greens in a landscape photo, use the Hue/Saturation adjustment layer and target the green color range.
Utilizing Selection Tools for Precision

Mastering selection tools is fundamental to efficient and precise image editing in Photoshop. Accurate selections allow for non-destructive editing, enabling you to manipulate specific areas of your image without affecting the rest. This section will explore the various selection tools available, their strengths and weaknesses, and techniques for refining your selections to achieve professional-level results.
Photoshop offers a range of selection tools, each designed for different tasks and image characteristics. Understanding their nuances is crucial for efficient workflow. The most commonly used tools include the Marquee, Lasso, Magic Wand, and Quick Selection tools. Each has its own strengths and limitations, making the choice of tool dependent on the complexity of the selection.
Selection Tool Comparisons
A comparison of the primary selection tools highlights their individual capabilities and best use cases. Understanding these differences will significantly improve your workflow.
| Tool | Description | Optimal Use | Limitations |
|---|---|---|---|
| Marquee | Creates rectangular, square, elliptical, and single-row/column selections. | Selecting perfectly straight-edged or uniformly shaped objects. | Ineffective for complex shapes or objects with irregular edges. |
| Lasso | Allows freehand selection with a variety of options (regular, polygonal, magnetic). | Selecting objects with irregular shapes, particularly when precision is needed. The magnetic lasso is particularly helpful for tracing edges. | Requires a steady hand for precise freehand selections. Can be time-consuming for complex selections. |
| Magic Wand | Selects pixels based on color similarity. | Quickly selecting areas of uniform color, like a solid background. | May select unintended areas if colors are not distinctly different. Struggles with complex images and subtle color variations. |
| Quick Selection | Uses intelligent algorithms to automatically select areas based on color and texture. | Rapidly selecting large areas or objects with relatively distinct boundaries. | Can be inaccurate with fine details or complex textures; may require refinement. |
Refining Selections
Regardless of the initial selection tool used, refinement is often necessary to achieve pixel-perfect results. Photoshop offers several tools and techniques to perfect selections.
Feathering: This softens the edges of a selection, creating a gradual transition between the selected and unselected areas. Imagine selecting a person against a background; feathering helps to blend the edges of the person, preventing a harsh, unnatural cut-out. This is accessed in the options bar after making a selection. A feathering radius of 2-5 pixels is often sufficient. A visual representation would show a selection initially with sharp edges, then after applying feathering, the edges would appear softer and more diffused.
Adding and Subtracting from Selections: The “Add to selection” (Shift + click) and “Subtract from selection” (Alt/Option + click) functions, accessible through the options bar or keyboard shortcuts, allow for building and refining selections incrementally. This is particularly useful for selecting multiple elements or excluding unwanted parts from an initial selection. For example, one could use the quick selection tool to broadly select an object, then use the lasso tool to subtract any unwanted parts that were incorrectly selected.
Refine Edge Tool: This advanced tool provides numerous controls for fine-tuning selections, particularly those with intricate details like hair or fur. Options include adjusting the radius, smoothness, contrast, and shift edge. A screenshot would show a before-and-after comparison, where a poorly defined selection of hair becomes much cleaner and more realistic after applying refine edge. The tool’s options allow for precise control over how the edges of the selection interact with the surrounding pixels.
Selecting Complex Shapes and Objects
Selecting complex objects like hair or fur requires a combined approach, leveraging multiple selection tools and refinement techniques. For instance, you might use the Quick Selection tool for a base selection, then refine it with the Lasso tool for intricate details, and finally use the Refine Edge tool to perfect the edges. The process is iterative, requiring patience and attention to detail. A successful selection would result in a clean separation of the object from the background, even with fine details like individual strands of hair.
For example, selecting hair might involve using the Quick Selection tool to initially select the majority of the hair mass. Then, the Lasso tool can be used to carefully select individual strands and refine the selection around the face and shoulders. Finally, the Refine Edge tool would be employed to smooth the edges and prevent any halo effect around the hair. A detailed screenshot would show the progression from a rough selection to a polished final result.
Comparing Selection Techniques for Compositing
Isolating objects from backgrounds for compositing demands careful selection. The choice of technique depends on the image complexity and desired outcome. Using the Magic Wand on a simple image with distinct color differences is efficient, but for images with complex backgrounds or fine details, the Quick Selection tool combined with Refine Edge offers greater precision. The Lasso tool, especially the magnetic lasso, provides maximum control for complex shapes, but it’s time-consuming. Each method has its advantages and disadvantages, influencing the overall efficiency and quality of the compositing process.
Harnessing Powerful Photoshop Filters and Effects

Photoshop’s filters and effects provide a vast array of tools to manipulate and enhance images non-destructively, offering creative control and efficiency. Understanding and applying these tools effectively can significantly elevate your image editing capabilities. This section explores essential filters, smart filters, custom presets, and layer styles, showcasing their practical applications.
Essential Photoshop Filters
A selection of essential Photoshop filters, categorized by function, will be presented. Mastering these tools allows for a wide range of image adjustments and creative effects.
- Sharpening: Unsharp Mask is a cornerstone sharpening filter, adjusting amount, radius, and threshold to control the intensity and area of sharpening. It’s ideal for enhancing details in slightly blurry images or adding crispness to text. For example, a slightly soft portrait could benefit from a subtle Unsharp Mask application to bring out the eyes and skin texture.
- Blurring: Gaussian Blur is a standard blurring filter, softening edges and reducing noise. Its radius setting controls the blur intensity. A practical use is softening harsh backgrounds in portraits or creating a dreamy effect in landscape photography. For instance, blurring the background of a product shot can draw attention to the product itself.
- Stylization: The “Find Edges” filter detects edges within an image, creating a high-contrast line art effect. This is useful for creating quick sketches from photographs or isolating specific elements within a complex image. Imagine converting a landscape photo into a stylized line drawing for a unique artistic interpretation.
- Distortion: The “Spherize” filter distorts an image, warping it into a spherical shape. This can be used for creative effects or to correct lens distortion in certain circumstances. For example, creating a fun, distorted self-portrait or subtly correcting the curvature of a wide-angle shot.
Smart Filters for Non-Destructive Editing
Smart Filters allow you to apply filters as layers, maintaining the original image data and allowing for adjustments or removal of the filter at any time. This non-destructive workflow is crucial for flexible and efficient editing.
- Convert your layer to a Smart Object by right-clicking the layer and selecting “Convert to Smart Object”.
- Navigate to Filter in the menu bar. Select your desired filter (e.g., Gaussian Blur).
- The filter will be applied as a Smart Filter, appearing as a layer within the Layers panel.
- Double-click the Smart Filter to modify its settings at any time, or simply drag the filter layer to reposition it. Deleting the Smart Filter reverts the image to its pre-filter state.
For example, applying a Gaussian Blur as a Smart Filter to a portrait allows for easy adjustment of the blur intensity without affecting the original image, enabling you to experiment with different levels of blur without re-applying the filter repeatedly.
Creating a Custom Photoshop Filter Preset
Creating custom filter presets saves time and ensures consistency in your workflow. This involves applying a series of filters and then saving the combined effect as a preset.
- Apply the desired filters to your image.
- Go to “Edit” > “Presets” > “Save Preset…”.
- Name your preset and choose a category.
- Click “OK” to save the preset. The preset will now appear in the Filter menu for easy access.
For example, you could create a preset combining a specific combination of sharpening, color adjustments, and a vignette effect, perfect for applying a consistent style to all your portrait edits.
Utilizing Layer Styles for Enhanced Visual Appeal
Layer Styles offer a quick and efficient way to add visual effects like drop shadows, bevels, embossing, and gradients to layers. These styles enhance image elements and text without altering the original content.
- Drop Shadow: Adds a shadow effect, creating depth and separation from the background. Adjusting the angle, distance, blur, and opacity controls the shadow’s appearance. A subtle drop shadow can make text stand out on a busy background, while a more dramatic one can create a 3D effect.
- Bevel and Emboss: Creates a three-dimensional effect by adding highlights and shadows to the edges of a layer. This can give text or images a sculpted look, adding texture and visual interest. Consider a subtle bevel to highlight a logo, or a more pronounced emboss to give text a raised, engraved appearance.
- Gradient Overlay: Adds a gradient color blend to a layer, creating a subtle or dramatic color shift. Experimenting with different gradient types and blending modes can produce various effects, ranging from soft color washes to vibrant highlights.
By applying different combinations of layer styles, you can create a vast array of effects, enhancing both images and text, adding depth, texture, and visual interest to your projects. For instance, a combination of a drop shadow, inner shadow, and gradient overlay can transform a simple text element into a visually striking design.
Concluding Remarks

By mastering layer management, precision selection tools, and powerful filters, you’ll gain the confidence and skills to create stunning visuals. Remember, practice is key. Experiment with the techniques Artikeld, explore the vast capabilities of Photoshop, and watch your design skills flourish. This journey into the core functionalities of Photoshop will empower you to create compelling and professional designs.