Unlocking the full potential of Sketch requires more than just familiarity with its tools; it demands a strategic approach to maximize efficiency. This guide delves into three key techniques to streamline your design process, transforming Sketch from a powerful tool into a seamless extension of your creative workflow. We’ll explore methods for mastering the interface, leveraging powerful features, and optimizing your overall design process, leading to significant time savings and improved design quality.
From conquering Sketch’s interface to harnessing its advanced features and refining your design process, we’ll equip you with practical strategies to elevate your Sketch skills. This guide provides a blend of actionable tips, illustrative examples, and insightful comparisons to empower you to design faster and smarter.
Mastering Sketch’s Interface for Speed

Sketch’s intuitive interface is a powerful tool, but maximizing its efficiency requires understanding its core functionalities and developing a streamlined workflow. By mastering keyboard shortcuts, optimizing layer organization, and utilizing the toolbar effectively, you can significantly reduce design time and improve overall productivity. This section will explore strategies to achieve this enhanced speed and precision.
Efficient Sketch Toolbar and Menu Usage
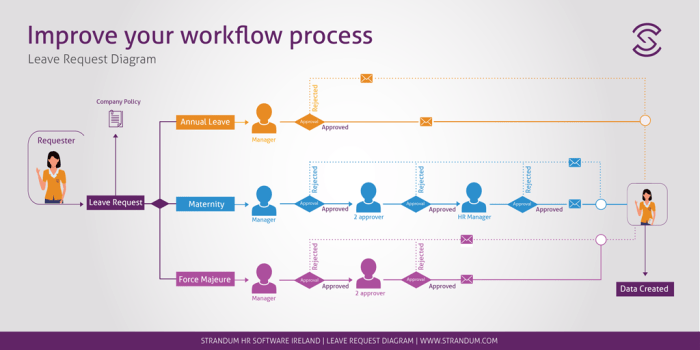
Effective navigation within Sketch’s interface is crucial for rapid design. The following workflow diagram illustrates an efficient approach to common tasks. Imagine this table as a visual guide for your daily workflow, illustrating the most direct path to completing tasks within Sketch.
| Task | Toolbar Action | Menu Action (Alternative) | Keyboard Shortcut |
|---|---|---|---|
| Create Rectangle | Click the Rectangle tool in the toolbar. | Insert > Rectangle | R |
| Create Text Box | Click the Text tool in the toolbar. | Insert > Text | T |
| Add Fill Color | Select shape, click the fill color in the Inspector panel. | Layer > Style > Fill | (No single shortcut, but using the color picker directly is faster) |
| Group Layers | Select layers, click the Group button in the Inspector panel. | Layer > Group | ⌘G (Mac), Ctrl+G (Windows) |
| Duplicate Layer | Select layer, click the Duplicate button in the Inspector panel. | Layer > Duplicate | ⌘D (Mac), Ctrl+D (Windows) |
| Create Artboard | Click the Artboard tool in the toolbar. | Insert > Artboard | A |
Sketch Keyboard Shortcuts Compared to Other Software
Sketch’s keyboard shortcuts are designed for speed and efficiency, though they differ slightly from other design software like Adobe Photoshop or Illustrator. While learning a new set of shortcuts initially requires effort, the long-term time savings are significant. For example, the common ‘⌘C’ (copy) and ‘⌘V’ (paste) shortcuts remain consistent, ensuring a smooth transition for users familiar with these standard commands. However, specific tool activation shortcuts, such as creating rectangles (‘R’ in Sketch), might differ from other programs. This necessitates a period of familiarization, but the resulting workflow optimization outweighs the initial learning curve. Mastering Sketch’s shortcuts allows for a more fluid and intuitive design process. The time saved by avoiding mouse clicks adds up dramatically over the course of a project.
Layer and Artboard Organization Best Practices
Effective layer and artboard organization is paramount for maintaining a clean and efficient workflow. A cluttered workspace slows down design considerably. Employing a consistent naming convention for layers (e.g., using prefixes to denote layer type or function, such as “btn-” for buttons or “txt-” for text) is a key practice. Grouping related layers into folders allows for easy selection and manipulation of complex elements. Similarly, artboards should be clearly named and organized logically within the Sketch file. Using a system such as naming artboards according to screen type (e.g., “Login Screen,” “Product Page”) allows for intuitive navigation. This systematic approach ensures easy identification and manipulation of design elements, leading to faster iteration and refinement. Regularly reviewing and cleaning up your layer structure is also essential to prevent the accumulation of unnecessary elements and maintain a streamlined design process.
Leveraging Sketch’s Powerful Features for Efficiency

Sketch offers a suite of powerful features designed to streamline your workflow and enhance design consistency. Mastering these tools will significantly reduce your design time and improve the overall quality of your work. This section will explore how to leverage Sketch’s symbols, shared styles, Boolean operations, and plugins to achieve maximum efficiency.
By effectively utilizing Sketch’s built-in functionalities and leveraging the vast library of available plugins, you can significantly enhance your design process. This leads to a more efficient workflow, allowing you to focus on the creative aspects of your design rather than getting bogged down in repetitive tasks.
Symbol and Shared Style Usage for Design Consistency
Maintaining consistency across a large project can be challenging. Sketch’s Symbols and Shared Styles are crucial for solving this problem. Symbols allow you to create reusable components, while Shared Styles ensure consistent styling across your project. Let’s walk through a practical example.
- Creating a Symbol: Imagine you’re designing a website and need a consistent button style. First, create your ideal button in Sketch, including shape, text style, and color. Then, select the button layer and go to Insert > Create Symbol. Give your symbol a descriptive name, like “Primary Button”. A new symbol master will appear in your Symbols panel. (Imagine a screenshot here showing a button being selected and the “Create Symbol” option highlighted. Then, a second screenshot showing the Symbols panel with the newly created “Primary Button” symbol.)
- Using a Symbol: Now, whenever you need a button, instead of recreating it, simply drag and drop the “Primary Button” symbol from the Symbols panel onto your artboard. Any changes made to the master symbol will automatically update all instances across your project. (Imagine a screenshot here demonstrating dragging and dropping the symbol onto an artboard.)
- Creating and Applying Shared Styles: Let’s say you want to ensure all your headings use the same font, size, and color. Select the text layer for your heading, and go to Insert > Create Style. Choose the appropriate style type (Text). This will add the style to your Shared Styles panel. To apply this style to other headings, simply select the text and choose the style from the Shared Styles panel. (Imagine a screenshot showing the creation of a text style, and another showing the application of that style to other text layers.)
Utilizing Boolean Operations for Complex Shapes
Sketch’s Boolean operations (Union, Subtract, Intersect) allow for the quick creation of complex shapes by combining or subtracting simpler shapes. This is far more efficient than manually creating complex paths.
For example, to create a unique badge shape, you might start with a circle and a rectangle. Using the “Subtract” operation, you can subtract the rectangle from the circle, creating a crescent-like shape. Similarly, using “Union” combines shapes into a single entity, and “Intersect” leaves only the overlapping area of selected shapes. (Imagine screenshots illustrating the use of Union, Subtract, and Intersect operations to create a complex shape from simpler shapes. The progression from simple shapes to the final combined shape should be clearly shown.)
Plugin Usage for Automation
Sketch’s plugin ecosystem expands its capabilities significantly. Many plugins automate repetitive tasks, saving considerable time and effort.
- Craft: This plugin streamlines the process of creating and managing styles, symbols, and design assets.
- Anima: Facilitates the creation of interactive prototypes directly within Sketch.
- Sketch Measure: Helps generate precise measurements and specifications for developers.
- Rename It: Automates the renaming of layers in a consistent and organized manner.
Optimizing Your Design Process with Sketch

Streamlining your workflow in Sketch is crucial for efficient design. By implementing strategic techniques and leveraging Sketch’s built-in features, you can significantly reduce design time and improve overall project quality. This section focuses on optimizing your design process within Sketch, encompassing workflow design, export settings, and prototyping techniques.
A Sample Mobile App UI Workflow in Sketch
A well-defined workflow is essential for managing complexity in UI design. The following table illustrates a sample workflow for creating a mobile app UI in Sketch, demonstrating a systematic approach from initial concept to final assets.
| Stage | Description | Sketch Actions |
|---|---|---|
| Initial Concept & Wireframing | Define the app’s core functionality and user flow. Create low-fidelity wireframes to map out the screen layout and user interactions. | Use basic shapes and text layers to quickly sketch out the app’s structure and navigation. Utilize Artboards to represent individual screens. |
| High-Fidelity Mockups | Refine the wireframes into high-fidelity mockups, incorporating visual design elements such as colors, typography, and imagery. | Import high-resolution images, apply consistent typography styles using text styles, and utilize color palettes for visual harmony. Employ symbols for reusable UI elements. |
| Component Creation & Organization | Create reusable components (symbols) for consistent UI elements across the app. Organize layers and artboards effectively for easy navigation. | Utilize Sketch’s symbol feature to create reusable buttons, icons, and other UI elements. Organize layers within groups and name them descriptively. Leverage pages to separate different sections of the design. |
| Testing & Iteration | Test the design with users and iterate based on feedback. Refine the UI based on user testing results and make necessary adjustments. | Use Sketch’s prototyping features to create interactive mockups for user testing. Gather feedback and iterate on the design based on the findings. |
| Exporting Assets | Export the design assets in the appropriate formats and resolutions for developers. | Use Sketch’s export feature to export individual assets or entire artboards in various formats (PNG, JPG, SVG) and resolutions optimized for different screen sizes and devices. |
Export Settings for Web and Mobile
Sketch offers various export settings to optimize image quality and file size for different platforms. Understanding these settings is crucial for delivering assets suitable for both web and mobile development.
For web, exporting images in SVG format is generally preferred for scalability and crispness. For raster images (PNG or JPG), higher resolutions (e.g., 2x or 3x) are recommended for retina displays. Exporting at the exact dimensions required by the web application avoids unnecessary scaling and maintains image quality.
For mobile, the export process depends on the target device’s resolution and pixel density. For example, an iPhone X requires different image dimensions and resolutions compared to an older iPhone model. Exporting images at the correct size and resolution for each device is essential for optimal display quality and performance. Using PNG for transparency and JPG for photographic images is a common practice. Exporting at 2x or 3x resolution for high-resolution screens is also advisable.
Utilizing Sketch’s Prototyping Features
Sketch’s prototyping capabilities allow designers to create interactive mockups. This enhances client presentations and user testing by providing a realistic representation of the final product. The process involves several key steps:
Creating interactive mockups within Sketch involves a straightforward process:
- Connecting Artboards: Define the flow between screens by linking artboards. Each artboard represents a screen in the app, and you connect them using transitions (e.g., push, fade).
- Adding Interactions: Specify actions triggered by user interactions (e.g., taps, clicks). These actions could include navigating to another screen, displaying a modal, or playing an animation.
- Setting Transitions: Choose appropriate transitions between screens to simulate realistic app behavior. Options include instant transitions, smooth animations, and page curls.
- Previewing and Sharing: Preview the prototype within Sketch or export it for sharing with stakeholders. This allows clients and users to interact with the design before development begins.
Wrap-Up

By mastering Sketch’s interface, strategically employing its advanced features, and optimizing your overall workflow, you can significantly enhance your design efficiency. The techniques Artikeld—from streamlined layer management to leveraging plugins and mastering export settings—are designed to empower you to create professional designs quickly and consistently. Remember, efficiency isn’t just about speed; it’s about achieving exceptional results with less effort, allowing you to focus on the creative aspects of your work.